Getting Started with the Screen Calipers
After you've installed the Screen Calipers you should find using the tool straightforward. You can use the tips below to get the most out of the Calipers and measure like a pro.
To use the Calipers drag them over the portion of a window you want to measure with the mouse. To extend the calipers drag the right hand side out using the mouse. The number in the text box will show the space being measured. The Calipers have several buttons which may appear differently on different skins. The arrow buttons on the slider will allow you to move and rotate the Calipers to measure any distance. The Diagonally downward pointing arrow hides the Calipers in the System Tray. All the controls can be accessed through the keyboard:
| Arrow Keys | Move Calipers |
| Shift + Arrow Keys | Extend Calipers |
| Ctrl + Arrow Keys | Move Calipers by 10 Pixels |
| Ctrl + Shift + Arrow Keys | Extend Calipers by 10 Pixels |
| Shift + > | Rotate clockwise |
| Shift + < | Rotate counter-clockwise |
| C | Cycle Color |
| K | Cycle Slider Color |
| F | Rotate to nearest 45 degrees |
| L | Rotate to last 45 degrees |
| A | Toggle Lock Angle |
| M | Toggle Lock Measurement |
| N | New Set of Calipers |
| Q | Quit |
| H | Hide in System Tray |
| F1 | Show Help |
| Ctrl+C | Copy Value to Clipboard |
| Ctrl+V | Paste Value from Clipboard |
| Z | Undo/Redo Movement |
| Doubleclick mouse | Flip between horizontal and vertical |
| Right-click mouse | Show Calipers menu |
While Dragging the Base:
| Shift | Limit movement to 45 degrees |
| Alt | Limit movement to angle |
While Dragging the Slider:
| Shift | Lock Angle |
| Alt | Lock Measurement |
| Ctrl | Override 'Sticky Angles' |
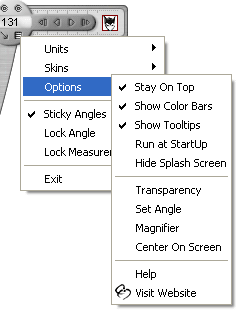
By typing a number and pressing 'Enter' the Calipers will extend to that distance. Simple calculations may be performed by typing -, +, *, or / and then a number, then 'Enter'; the Calipers will extend to the new relative position. When Closed the Calipers sits in the System Tray. By Right-clicking anywhere on the face of the Calipers, or clicking on the System Tray icon the Calipers menu is displayed. The menu is divided into four sections:
| Units | Change the scale of measurement |
| Skins | Choose a new user interface |
| Options | Access more options |
Additionally there are the options:
| Sticky Angles | Snap rotation to nearest 45 degrees |
| Lock Angle | Lock angle when dragging |
| Lock Measurement | Lock measurement when dragging |
| Exit | Close the program |
The Units menu allows you to choose a new unit from the list of predefined units. You may also configure your own Custom Units using the 'Configure Units' menu option. Choosing this option will bring up a screen which allows you to choose a Custom Unit, rename and set the scale. You may also set the zero point, enabling easy relative measurement to be calculated. The Skins menu presents several different choices for the user interface of the Calipers. By choosing the "Get More Skins" menu item you will be taken to the Screen Calipers skin webpage. This allows you to browse and download new skins. Full instructions are given on the webpage. The Options menu contains a sub menu of the following options:
| Stay On Top | Controls floating above other windows |
| Show Color Bars | Shows/Hides edge Color Bars |
| Show Tooltips | Shows/Hides info popups for buttons |
| Run at Startup | Opens Calipers when computer starts |
| Hide Splash Screen | Hides the picture at startup |
| Transparency | Pops up a slider to control how see-through the application is |
| Set Angle | Allows you to type an exact angle to rotate the Calipers to |
| Magnifier | Opens the IconicoScreen MagnifierApplication |
| Center On Screen | Moves the Calipers to screen center |
| Help | Shows Help |
| Unlock Application | Accepts your serial number |
| Visit Website | Links to Caliper homepage |
Configure Custom Units
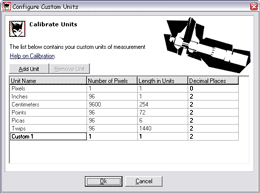
The Calipers can be configured to measure in Pixels, Inches, Centimeters, Points, Picas and Twips. By clicking the 'Calibrate Units' menu item you can easily define any number of additional units of measurement. You can also change the number of decimal places that a unit is measured in. The Caliper's measurements are based on pixels. When the units are changed to inches or centimeters the Calipers use a standard conversion factor to determine the measurement. If you measure something with the Calipers to be an inch, then a printout on a standard printer of that picture will also be an inch. The Calipers do not take into account the size as it is displayed on your monitor, so different resolutions will still measure one inch. The Calipers use conversion factors to determine the built in units. You can adapt these units and enter your own custom units. The easiest way to configure the Calipers is to extend the calipers so that you measure exactly ten of your new measurements. Then open the "Configure Units" screen and enter the current number of pixels measured by the Calipers in the 'Number of Pixels' column. In the 'Length in Units' column enter '10' and the Calipers will be calibrated.
Adobe Acrobat Toolbar
The Screen Calipers for Windows can be used directly from Adobe Acrobat to measure PDF documents, both the Reader and the full versions. From Adobe Acrobat™ right click on the menu area and choose 'Iconico Calipers'. The following toolbar will appear:
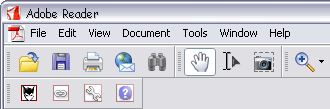
Clicking the leftmost icon will launch the Screen Calipers and automatically link it to the PDF document. This means that any time you zoom in or out on the PDF with the Acrobat zoom tools the Screen Calipers will be linked to correctly measure distances regardless of the zoom factor. When the Calipers is linked the following toolbar icons are displayed:
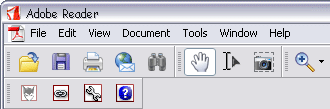
Clicking the second icon to the left will unlink the Calipers from the magnification factor of Acrobat, and the following icon, with an unlinked state will be shown:
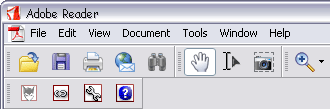
The next button to the right opens the Calipers Calibration screen, and the last opens the Calipers help file. The plugin works on Adobe Acrobat and Acrobat Reader versions 5, 6, 7 and 8.
Troubleshooting
Tips on Measurement


